
So you’ve landed in Tokyo and you’re standing at the airport, about to tackle the Japanese public transportation system. You’ve heard crazy things. Read scary stories.
But your experience is gonna be better than what you’ve seen online about navigating Tokyo. Because you’ve done your research and you’re prepared to tackle the trains and subways and buses.
Plus you’ve got this Tokyo public transportation guide to help you get from the airport to your hotel and beyond. The sooner you have that down, the sooner you get to enjoy your Tokyo itinerary.
Table of Contents
Airport Transfers
Haneda Airport
First up is Haneda Airport. If your plane landed here, congratulations! This airport is much closer to central Tokyo so your airport transfer will take less time.
Let’s take a look at some transport options.
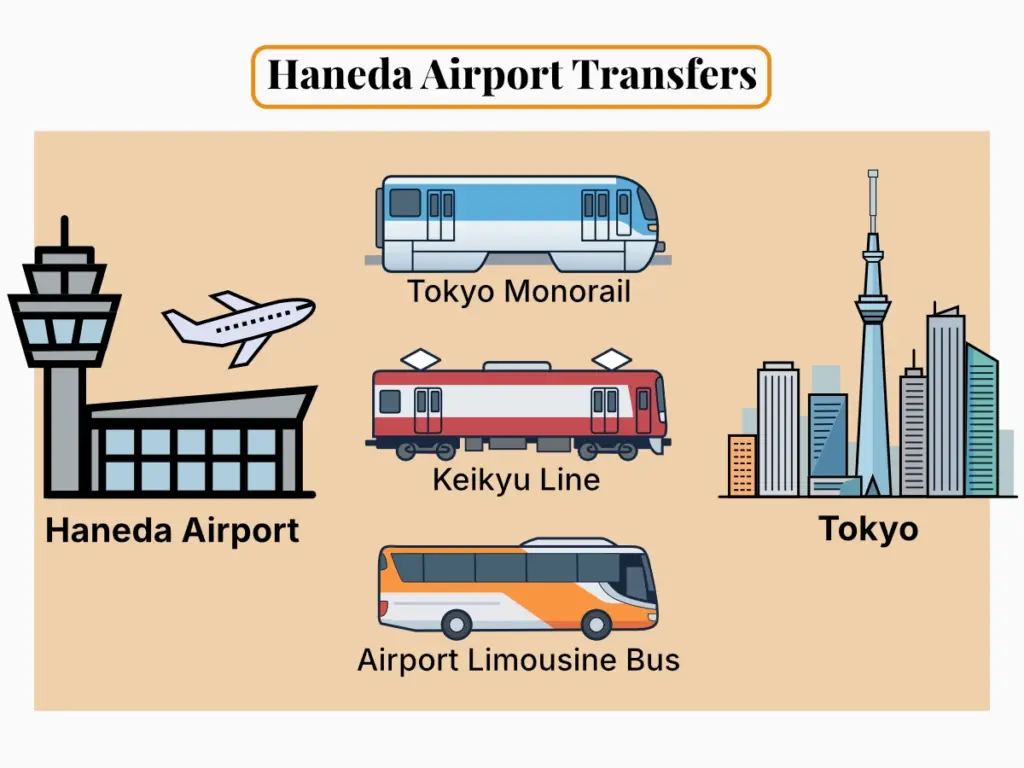
Tokyo Monorail
The Tokyo Monorail is a fast and reliable option that leaves the airport every 5 minutes. If you’ve got multiple suitcases with you, there are racks, overhead space, and dedicated spots by the doors to store luggage. Plus, the monorail takes you past scenic views of Tokyo Bay along the way.
If you arrived at Terminal 3 from your international flight, the station entrance is conveniently right on the 2nd floor.
One thing to keep in mind when taking the monorail though is that you’re going to have to do a transfer to get to central Tokyo. The monorail ends at Hamamatsucho Station, where you can transfer to the JR Yamanote or Keihin-Tohoku lines to get to your final destination.
Bonus Tip: On weekends, holidays, and some select days, you can buy the Monorail and Yamanote Line Discount Ticket for only ¥590. This covers your ride from Haneda Airport to any station on the Yamanote Line. Tickets can be purchased at the stations in Haneda Airport Terminals 1, 2, and 3.
Keikyu Line
For the cheapest option from the airport to central Tokyo, you can take the Keikyu Line.
There’s different train types, ranging from the Airport Limited Express and Rapid Express (which are faster and skip stops) to the local train that stops at all stations.
If you’re traveling to Asakusa or Ginza, the most important thing is to check the train’s final destination. Make sure you take a train bound for Imba-Nihon-Idai, Aoto, Oshiage, or Narita.
These trains have a “through-service” where the train connects to the Asakusa Subway Line.
You don’t have to get off, change platforms, or buy a new ticket when this happens. The screens inside will just change names.
Airport Limousine Bus
If, after a long flight, the last thing you want to do is navigate the Tokyo public transportation system while lugging all your stuff behind you, then the Airport Limousine Bus is your best friend.
These buses offer direct routes from Haneda to major hotel hubs, train stations, and the Tokyo Disney Resort. And you can hand in your luggage (limit of 2!) to an attendant before getting on the bus and they can stow it under the bus for you.
You don’t have to worry about train transfers or if you can even get a seat on the train. You get a guaranteed seat to nap in while someone else is navigating Tokyo for you.
The Limousine Bus is the best option if you’re staying in Shinjuku or Shibuya because the trains to get to those areas are massive and hard to move around in with luggage.
It’s also the best way to get to Tokyo Disney because you skip multiple train transfers.
Some things to keep in mind though:
Traffic: This is a bus so travel times are dictated by Tokyo traffic. A trip to Shinjuku usually takes 45 to 60 minutes but takes longer during rush hour.
Tickets: Ticket prices run around ¥1,300 to ¥1,400 depending on your destination. You can buy tickets at the counters in the arrival lobby. But buses can fill up quickly (especially at peak times) so we recommend reserving your Limousine Bus tickets in advance so you have a guaranteed seat waiting for you when you land.
Which Route is Right For You?
We know that after a long flight, trying to remember the difference between the Keikyu Line and the Monorail can be overwhelming. So to hopefully make it a little easier for you, we’ve put together this quick cheat sheet. Just find your hotel’s neighborhood below to see our top recommendation (and a solid backup option).
| Your Hotel Area | Best Option (Time / Cost) | Why It’s the Best | Alternative (Time / Cost) |
|---|---|---|---|
| Shinjuku / Shibuya | Airport Limo Bus (60m / ¥1,400) | Direct to major hotels/stations | Keikyu + JR (50m / ¥540) – or – Tokyo Monorail + JR (50m/ ¥730) |
| Asakusa | Keikyu Line Direct (45m / ¥600) | Direct through-service (no transfer)* | Airport Limo Bus (80m / ¥1,300) |
| Ueno / Akihabara | Monorail + JR (40m / ¥710) | Scenic views of Tokyo Bay | Airport Limo Bus (60m / ¥1,400) |
| Ginza | Keikyu Line Direct (30m / ¥530) | Direct through-service (no transfer)* | Airport Limo Bus (50m / ¥1,400) |
| Tokyo Disney | Airport Limo Bus (45m / ¥1,300) | Drops you right at the Parks or Resort Hotels | Train** (60m / ¥900) |
*Make sure you get on the train that connects to the Asakusa Line so you don’t have to make transfers.
The digital screens inside will change names, but you do not get off the train.
**Warning: The transfer at Tokyo Station involves a 10-15 minute walk.
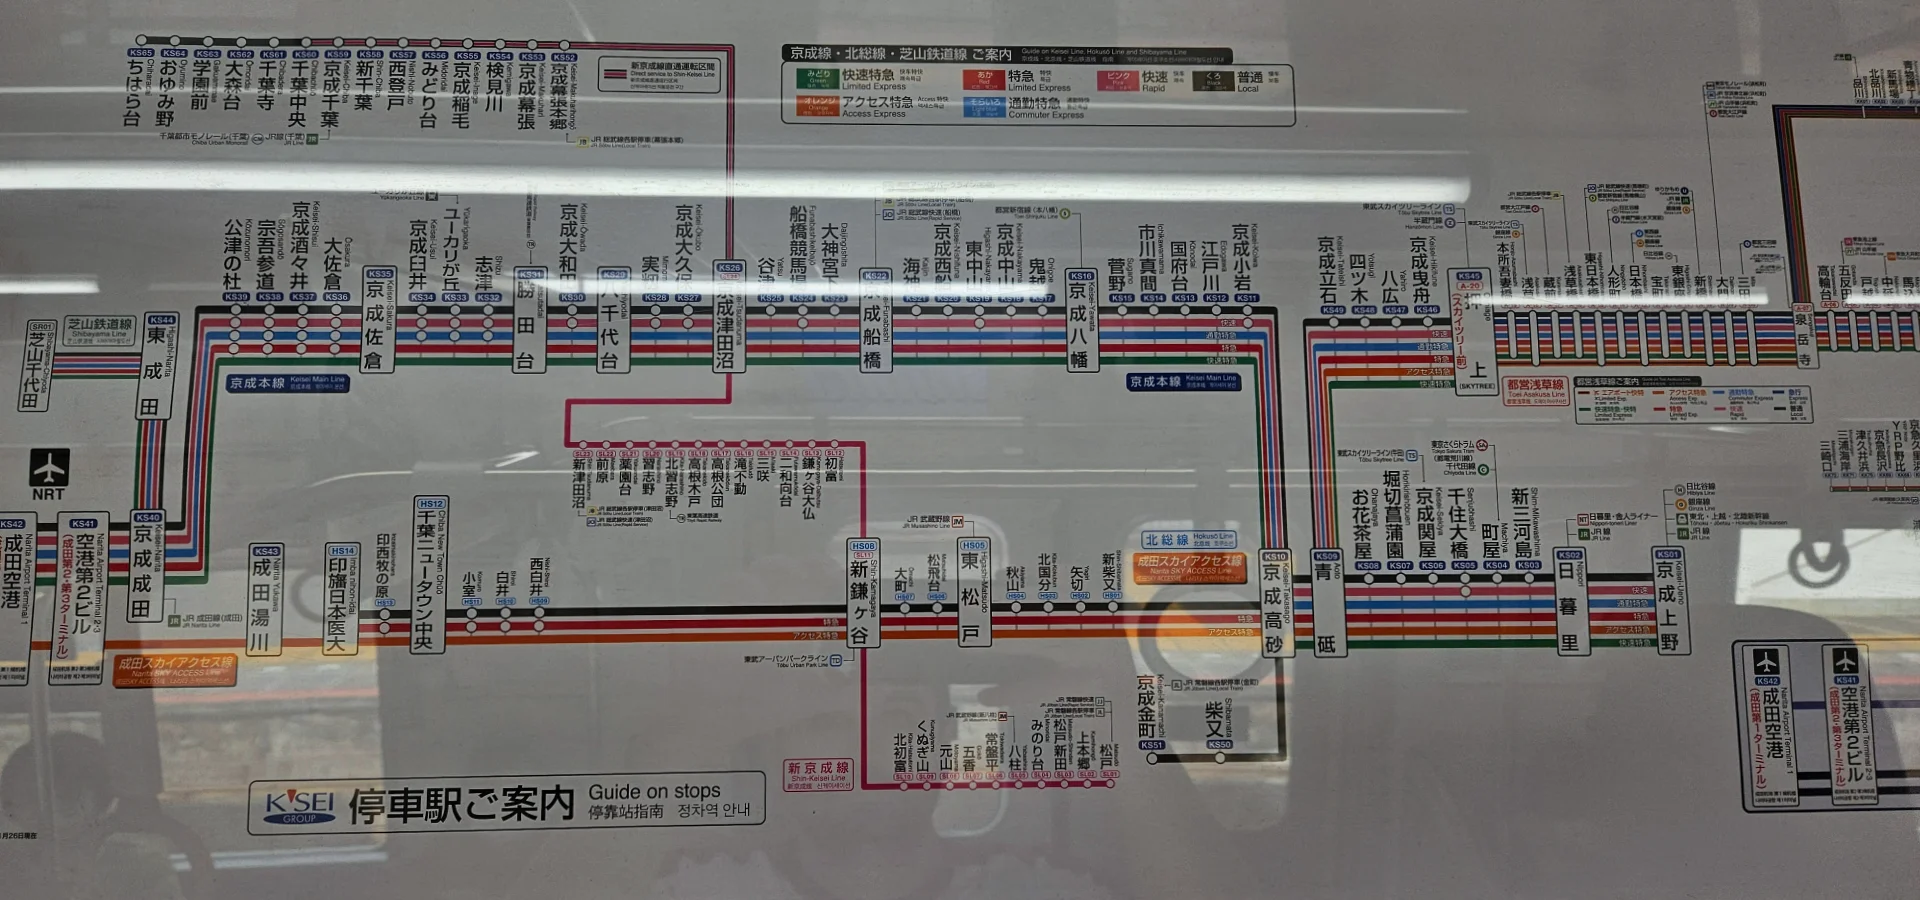
Narita Airport
Ok, time for Narita International Airport.
This airport is usually where most visitors land since it’s the hub for most international flights headed to Tokyo.
This airport isn’t actually in Tokyo, it’s in Chiba Prefecture 60 kilometers (~37 miles) away. Which means that it takes longer to get to the city from here.
But not to worry. Here’s some transport options to easily get you from the airport to your hotel in Tokyo.
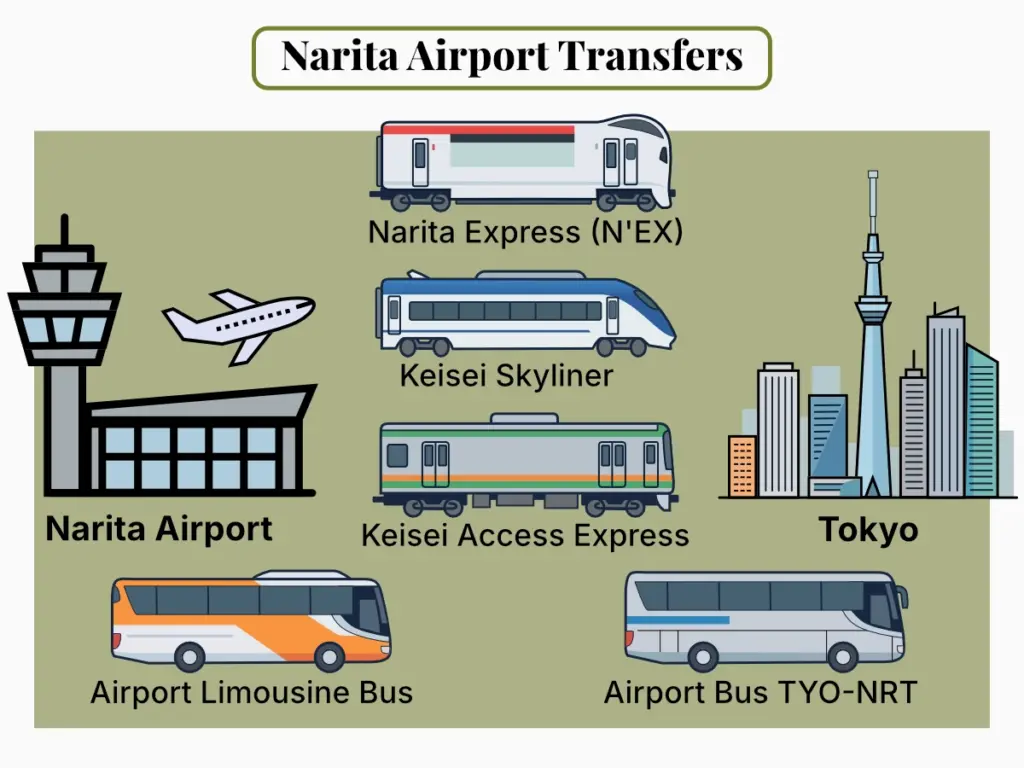
Narita Express
The Narita Express (N’EX) is a direct train that connects the airport to major train stations in Tokyo.
The train has overhead storage space, and there are luggage racks by the doors where you can store large suitcases.
Keep in mind that you need to reserve your seats on the N’EX. This means that you get a guaranteed seat. It also means that seats can sell out.
You can reserve your N’EX ticket in advance and redeem your ticket in one of the JR East ticket machines when you land. (Your passport also needs to be scanned at the machine to redeem the ticket).
Bonus Tip: If your flight back home leaves from Narita Airport as well, you can actually purchase a N’EX TOKYO Round Trip Ticket, which is cheaper than buying two separate tickets.
Keisei Skyliner
If you’re trying to get to central Tokyo (Nippori/Ueno) from Narita Airport, then the fastest option is taking the Keisei Skyliner. The Skyliner connects the airport directly to the Nippori and Keisei-Ueno stations (where you can transfer to other lines to get to other parts of Tokyo).
Just like the N’EX, there are dedicated storage racks for your luggage, as well as overhead racks.
Just like the N’EX, the seats are reserved so you get a guaranteed seat once you get a ticket. You can reserve your Keisei Skyliner ticket in advance and redeem it at the Keisei Skyliner ticket counter when you land. (You will need to show your passport to the staff to redeem your ticket).
Keisei Access Express
If your destination is Asakusa, then taking the Keisei Access Express might be the option for you.
It’s a much cheaper option compared to the N’EX and the Keisei Skyliner.
However, it is a commuter train. Meaning you don’t have to make a reservation. Meaning you don’t get a guaranteed seat.
There’s also no dedicated storage space for your luggage on this train so you’re gonna have to hold on to your suitcases the whole way.
What it does have is direct access to the Asakusa Line, which makes it convenient to get to Asakusa from the airport. It’s great if you’re traveling light and don’t want to deal with transfers.
IMPORTANT: Make sure the train you board is bound for Haneda Airport or Nishi-Magome. These are the ones that connect directly to the Asakusa Line!
Airport Bus
Taking an airport bus is a great option if you want to avoid walking around train stations with heavy luggage. It’s very convenient if you’re staying near major train stations and popular hotels.
Because it is a bus, travel times are affected by traffic. So it might take longer to reach your destination during busy times like rush hour.
Airport Limousine Bus
Airport Limousine Buses offer direct routes from Narita to major hotels, train stations, and the Tokyo Disney Resort.
You can keep up to 2 pieces of luggage under the bus. Just hand them to the bus attendant who will store the luggage for you.
Seats on the Limousine Bus are reservable and they do fill up quickly. You can reserve your Limousine Bus ticket in advance so you have a guaranteed seat waiting for you when you land.
NOTE: We think taking the Airport Limousine Bus is the best way to get to Tokyo Disney because you skip multiple train transfers.
Airport Bus TYO-NRT
This airport bus is a good budget-friendly option if your destination is close to the Tokyo or Ginza stations.
The seats aren’t reserved but you need to buy a ticket at the bus counter before heading outside to queue up for your bus. We suggest queuing up 5-10 minutes before departure because the seats aren’t assigned.
And unlike the Limousine Bus, you’re limited to one suitcase that can be stored under the bus.
Which Route is Right For You?
I know that was a lot of information. So we’ve put together this quick cheat sheet to make the Tokyo airport transfer easier for you. Just find your hotel’s neighborhood below to see our top recommendation (and a solid backup option).
| Your Hotel Area | Best Option (Time / Cost) | Why It’s the Best | Alternative (Time / Cost) |
|---|---|---|---|
| Shinjuku / Shibuya | Narita Express (90m / ¥3,300) | Direct and spacious | Keisei Skyliner + JR (75m / ¥2,700) – or – Airport Limo Bus (100m/ ¥3,600) |
| Asakusa | Keisei Access Express (60m / ¥1,380) | Direct | Keisei Skyliner + Subway (60m / ¥2,800) |
| Ueno / Akihabara | Keisei Skyliner (45m / ¥2,580) | Direct to Keisei-Ueno Station | Keisei Main Line (90m / ¥1,050) |
| Ginza | Airport Bus TYO-NRT (80m / ¥1,500) | Cheap, frequent, and drops you off near Ginza Station. | Keisei Access Express (70m / ¥1,500) |
| Tokyo Disney | Airport Limo Bus (80m / ¥2,900) | Direct. Most convenient. | Train* (80m / ¥3,300) |
*Warning: The transfer at Tokyo Station involves a 10-15 minute walk.
Luggage Forwarding (Takuhaibin)
If you’re traveling to Tokyo with A LOT of luggage (No judgement here! We love a prepared queen (or king)!), or just don’t want to deal with the hassle of dealing with the Tokyo public transportation system with a bunch of stuff, then let me introduce you to takuhaibin.
Takuhaibin is a luggage forwarding system where you can ship your bags directly from the airport arrival lobby to the front desk of your Tokyo hotel. It’s available at both the Haneda and Narita airports. You can even reserve your delivery service online so all you have to do is drop off your bags when you arrive.
Here’s what you need to know.
- The Providers: After you go through customs, follow the signs for “Baggage Delivery.” You will see counters like Yamato Transport and JAL ABC.
- The Cost: A standard large suitcase typically costs around ¥2,500 to ¥3,500 per bag, depending on the exact size.
- The Process: Walk up to the counter, show them your hotel booking confirmation so they have the exact address in Japanese, pay the fee, and deposit your bag(s). If you already have a reservation online, just follow the instructions they provide for a quick drop-off.
IMPORTANT: Check if your luggage forwarding is same-day or next-day delivery. If next-day, make sure you have everything you need before you deposit your bags. Have a small bag packed with a change of clothes, toiletries, and any medications (and obviously your passport and wallet)that you’ll need until your luggage arrives at the hotel.
Pro Tip: Avoid the whole luggage hassle by carrying everything you need on your back. We traveled Japan and beyond with a backpack, and you can too! Check out how in our Slow Travel Toolkit.
Planning your next trip but don’t know where to start?
Join our newsletter to get our free Slow Travel Toolkit!
It includes our essential pre-departure checklist, a budget guide and tracker, and the packing list we used for 15 months of travel.
Late Night Arrivals
If your flight lands late, like after 10PM late, there’s significantly less transport options to get you to Tokyo. People assume that Tokyo is a 24-hour city where trains run all night. They unfortunately do not.
If you land after 10:00 PM, by the time it takes you to clear customs and get your luggage, you will probably miss the last trains.
The Reality of Haneda (HND) at Night
The Last Trains: The last Keikyu Line and Tokyo Monorail trains leave the airport around midnight. Please note that even if you catch this train, you might miss your connecting subway or JR train in the city!
Late Night Buses: There are a few Airport Limousine buses that run late-night routes to major areas like Shinjuku. However, late-night fares are much more expensive, typically ¥2,800 instead of ¥1,400.
Taxis: If you miss the bus, you will need a taxi. Taxis have a 20% late-night surcharge between 10:00 PM and 5:00 AM on top of the standard fare price. A taxi from Haneda to central Tokyo (like Shinjuku) after midnight will cost around ¥10,000 to ¥13,000.
The Reality of Narita (NRT) at Night
Narita is a much harder issue if you arrive late at night. Because it’s an hour outside the city, missing the last train gets really expensive.
The Last Trains: The final Narita Express (N’EX) train leaves before 10 PM and the last Keisei Skyliner and Keisei Sky Access trains leave the airport around 11 PM. Please note that even if you catch the last Keisei trains, you might miss your connecting subway or JR train in the city!
Late Night Buses: The airport buses run a few late routes to Tokyo until about 11 to 11:30 PM.
Taxis: A late-night taxi from Narita to Tokyo is ridiculously expensive. With the 20% late-night surcharge, you can easily spend ¥30,000+ ($200+ USD) on a ride.
What We Recommend
If you land at Narita after 10 PM, or Haneda after 11:30 PM, do not stress yourself out trying to sprint through customs to catch a train.
Instead, book a hotel near the airport for your first night (ideally somewhere walkable). Wake up refreshed, grab a coffee, and take the cheap, easy morning trains into the city!
Getting Around Tokyo
Yaaay, you’ve made it to your accommodation by now! You’ve settled in but now you’re ready to start exploring. Or grab some food.
Good news, Japan has one of the best public transportation systems out there. It’s super clean, super punctual, and not really as difficult to navigate as a lot of people might lead you to believe.
You literally just search your destination on Google Maps and you’re good to go.
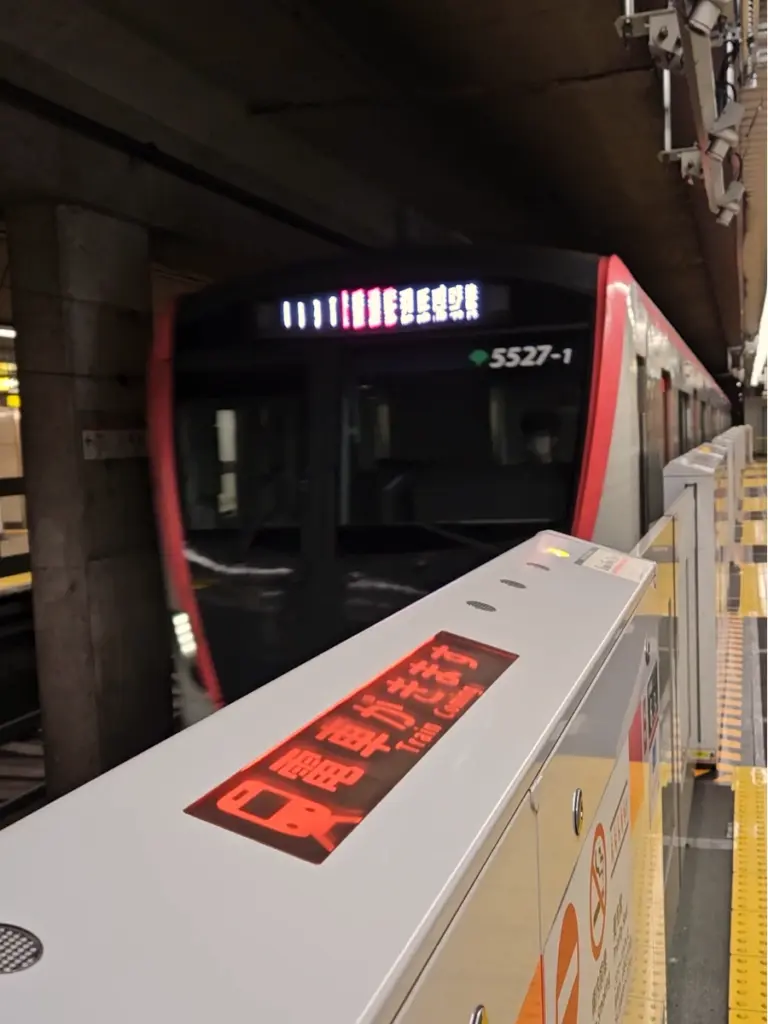
Here’s a breakdown of your Tokyo public transportation options.
JR Lines
Japan Railways (JR) operates a lot of the train lines in Tokyo (and all of Japan).
If you’re in central Tokyo, you’ll probably be taking the JR Yamanote Line A LOT. You might know it as the green line, and it’s one of Tokyo’s biggest and busiest train lines.
The JR Yamanote goes in a loop that connects so many major stations including Shinjuku, Shibuya, Harajuku, Ueno, Akihabara, and Tokyo Station.
Tokyo Subway
Another great option for transport is the subway system, especially if you’re trying to get to places that the JR lines don’t cover like Asakusa, Ginza, and Roppongi.
There are actually two different companies, Tokyo Metro and Toei Subway, but you don’t need to know the difference. Google Maps will tell you exactly what train to take.
Every subway line has a specific color and letter, and every station has a number.
For example, the Ginza Line is an orange circle with a “G.” So if you have to take this line, just follow the orange “G” signs to find your platform.
If Google Maps tells you to get off at G-16 (Asakusa), you just watch the digital screens above the doors and get off when the number hits 16!
Buses
I never had to take a bus in Tokyo just because the JR and subway lines are so efficient and cover so much of the city already.
But buses are great for getting to specific places like neighborhoods or cafes that the subway might not be able to reach.
It’s super straightforward. If Google Maps tells you to hop on a bus, you just board the bus and pay a flat fare right away. The bus doesn’t really give you change, so make sure you put in the exact amount for your fare. The buses do have money-changers that accept ¥1,000 notes so you can break one up into smaller bills before paying your bus fare.
I think the easiest way to pay the bus fare is by tapping your IC Card on the scanner next to the driver! More on that later.
When your stop is coming up on the digital monitor, you just press one of the “stop” buttons to let the driver know, and then you exit.
Taxis
Now we’ve got the final option: taxis. I have never taken a taxi in Tokyo because I’ve never had to.
But if you’re exhausted and just want an easy way back to your hotel, or you’ve missed the last train back, or if you just really want to take a taxi, then this option is for you.
Taxis in Tokyo are super clean and super easy to get. You can even use Uber to get one. The difference is that while you get picked up by someone in their personal car in the US, Japan Uber actually summons an actual metered taxi for you.
You can also download the Go app, which is Japan’s most famous taxi app.
IC Cards
So now you know how to get to Tokyo AND how to get around Tokyo. I think this is the perfect time to tell you my number 1 most recommended tip for getting around Tokyo (and really all of Japan).
Get an IC card.
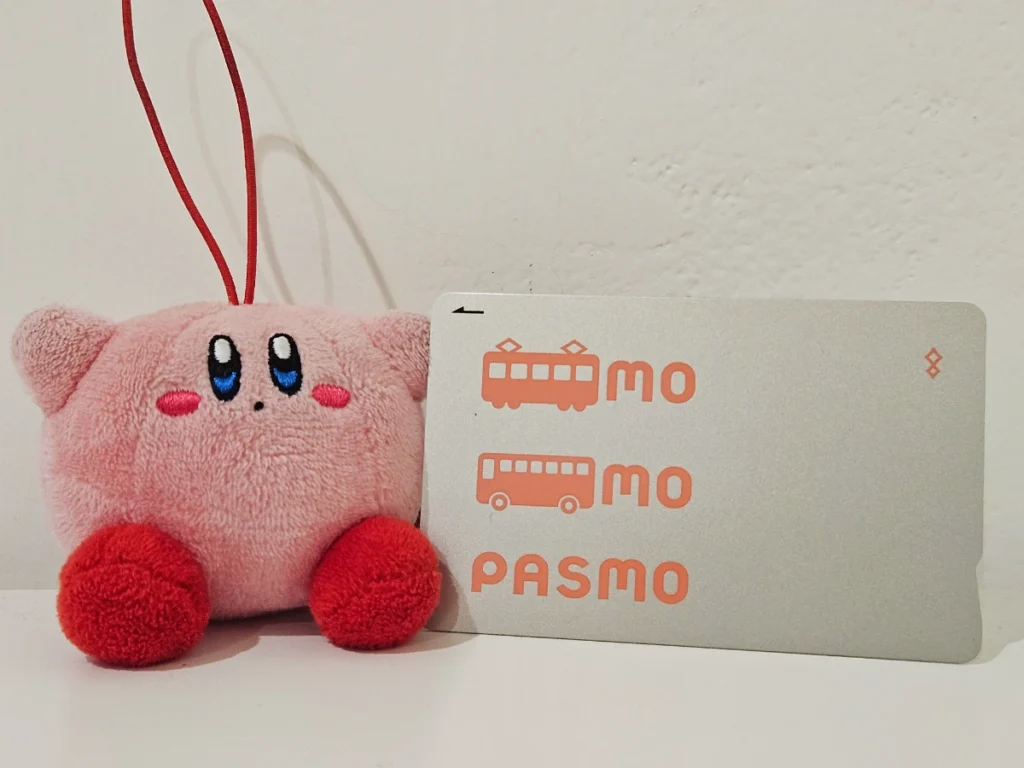
An IC card is a reloadable, prepaid transit card. You use it on almost every single public transportation option (JR trains, subway lines, buses!) in Japan, and you skip the hassle of buying individual tickets.
So instead of trying to figure out which button to press on the ticket machines every time you go anywhere, you can just tap your IC card at the ticket gate scanner and you’re good to go! The fare is automatically deducted from your card.
Plus, you can actually use the IC card to pay for purchases at convenience stores, vending machines, and even some restaurants and supermarkets!
You can buy IC cards at major stations and top them up at the ticket machines in any station and even in convenience stores. Top-ups require cash so make sure you have some handy!
If you’re flying into the Haneda airport, you can also buy an IC card online and pick up the physical card from the airport upon arrival in Japan.
For iPhone Users: If you have an iPhone, add an IC card to your Wallet and skip buying a physical card. You can use your phone to tap the train and bus readers and you can add more money to your Suica with a credit card. You just do it in the Wallet app using Apple Pay.
For Android users: Androids bought outside of Japan won’t have the capability to add the digital Suica. You’ll have to get a physical IC card and tap that at the gates.
Is The JR Pass Worth It?
When planning your Japan trip, you’ve probably seen videos of people saying you must (or must not) buy a JR Pass. For a while, getting a JR Pass was 100% THE MOVE. But the JR Pass increased in price so much that it might not make the most sense for a lot of travelers.
Shinkansen
Before we get to whether or not you should get the JR Pass, let’s talk about what it actually covers.
The JR Pass covers all JR trains, JR buses, and even a ferry (JR-West Miyajima) in Japan. This includes the N’EX and Tokyo Monorail that we talked about earlier as well since they are both operated by JR.
Another huge thing that the JR Pass covers are the Shinkansen, or bullet trains.
While the local Tokyo JR trains like the Yamanote Line (also covered) get you around Tokyo, the Shinkansen takes you between major cities.
So if your Japan trip itinerary has you going from Tokyo to Osaka, then you’ll probably be taking the Shinkansen. It’s a smooth, fast, and super comfortable way to travel far distances in Japan.
The JR Pass covers the Shinkansen (except the Nozomi and Mizuho trains), but you can also just buy individual Shinkansen tickets for the exact trip you want to take. You can get them at the ticket machines at major JR stations, or book them online in advance.
JR Pass Reality Check
The nationwide Whole Japan JR Pass gives you unlimited rides on almost all JR operated transport options (even a ferry!) in Japan for 7, 14, or 21 days.
So, is it worth it? For the majority of travelers, NO.
Let’s do some quick math.
A 7-Day Whole Japan JR Pass currently costs ¥50,000.
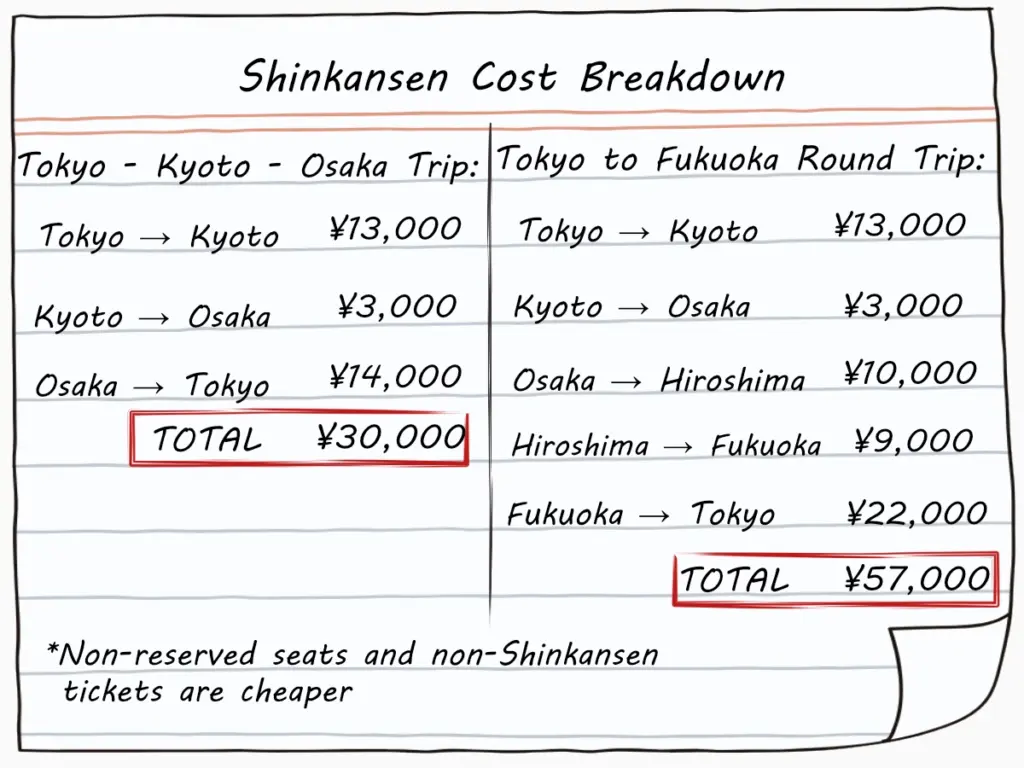
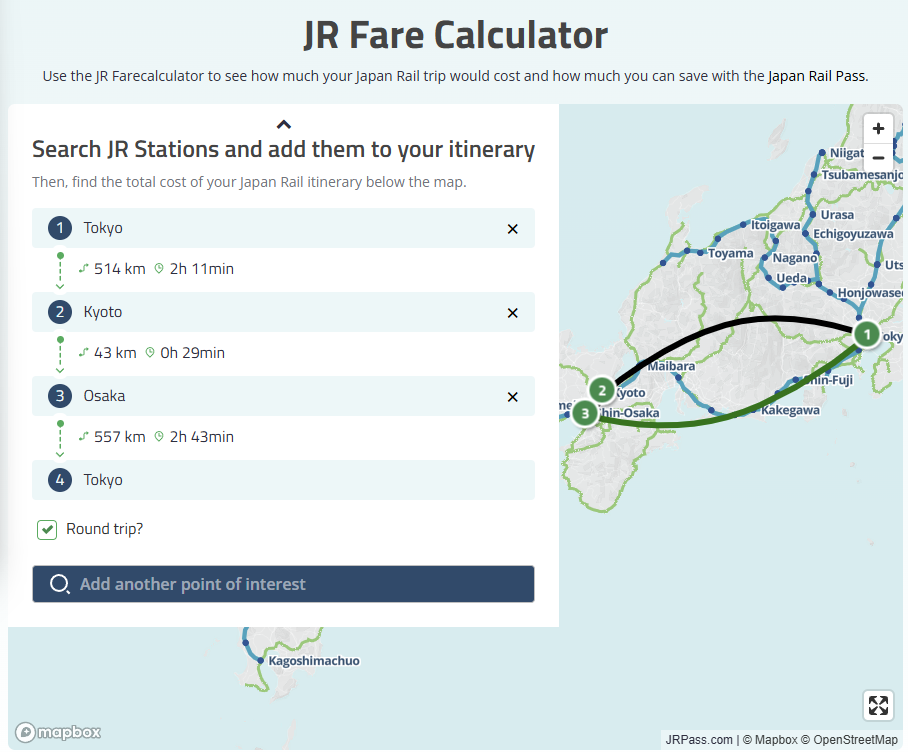
A lot of people traveling to Japan are after the same 3 major cities: Tokyo, Kyoto, and Osaka.
That’s a total of ~¥30,000.
You’re not gonna be spending an additional ¥20,000 on any of the local JR trains and buses you happen to take while in the cities you’re visiting to make that pass worth it.
You would have to take multiple long-distance bullet train trips within that strict 7-day window (like the Tokyo to Fukuoka Round Trip example) just to break even.
When you travel like that, you aren’t really experiencing the culture or immersing yourself in a destination. You’re spending half your vacation on a train.
So unless you are planning an incredibly fast-paced, cross-country itinerary, you’ll be saving money (and stress!) by buying individual tickets.
You can use an online calculator like the one from JRPass.com to see if your itinerary is worth it.
Regional Passes
Even if the Whole Japan JR Pass doesn’t make sense for your trip, that doesn’t mean all the other passes won’t!
There are actually regional pass options that might be great for your itinerary.
Tokyo Subway Ticket (24, 48, or 72 Hours)
If your accommodation is near a subway station or you don’t plan on using the JR lines much, this is a great budget option. You get unlimited rides on all Tokyo Metro and Toei Subway lines for 24, 48, or 72 hours.
The 72-hour pass costs about ¥1,500. Since a single subway ride is usually around ¥180-¥220, you only need to ride the subway 7 or 8 times over three days for it to pay for itself.
You can buy the Tokyo Subway passes at the airport or purchase your Tokyo Subway Ticket online to pick up via a QR code at the station.
JR Tokyo Wide Pass
If you’re staying in Tokyo but want to check out the surrounding areas, then the JR Tokyo Wide Pass is for you. It gives you 3 days of unlimited travel on JR trains (including many Shinkansen!) within the Kanto region.
The 3-day pass costs ¥16,000, and it pays for itself if you do just one round-trip to a further destination like Nikko or the Gala Yuzawa ski resort.
It also covers the Fujikyu Railway to Kawaguchiko (Mt. Fuji area), which is a huge plus.
Private Railway Passes
Hakone Free Pass: If you are heading to Hakone for the hot springs and views of Mt. Fuji, the Hakone Free Pass covers your round-trip from Shinjuku plus all the cable cars, ropeways, and even a pirate ship cruise on Lake Ashi.
Nikko Pass: Operated by Tobu Railway, the Nikko Pass is the most cost-effective way to get from Tokyo (Asakusa) to the shrines and national parks of Nikko.
Which Pass is Right For You?
So just like with airport transfers, here’s a cheat sheet to help you decide what (if any) pass is right for you.
| If your itinerary looks like this… | Our Recommendation | Why? |
|---|---|---|
| Staying in Central Tokyo | IC Card + Tokyo Subway Ticket | You don’t need much. The subway gets you to anywhere you need, and you can tap your IC card for any JR trains you use. |
| Staying in Tokyo + Multiple Day Trips (e.g., Nikko and Mt. Fuji) | JR Tokyo Wide Pass | This 3-day pass pays for itself with just one round-trip Shinkansen ride to a nearby destination. |
| Staying in Tokyo + Hakone Day Trip | Hakone Pass | Round-trip train from Shinjuku and unlimited rides on local buses, cable cars, ropeways, and a pirate ship cruise on Lake Ashi. |
| Staying in Tokyo + Nikko Day Trip | Nikko Pass | Round-trip train from Asakusa and covers the local buses. |
| The Tokyo ➔ Kyoto ➔ Osaka ➔ Tokyo Route | Individual Shinkansen Tickets | Individual tickets are cheaper and allow you to take your time at all your destinations. |
Japan Train Etiquette
Japan’s public transportation system is peaceful, clean, and efficient. And that’s because everyone follows a few unwritten rules.
1. Queue Up Properly
When you are waiting on the platform, there are painted lines on the ground showing where the doors will open. People line up in straight, orderly queues here. When the train arrives, stand to the side of the doors and wait for everyone to exit before you step on. There is no pushing or rushing the doors!
2. Keep Quiet
Your phone should be silenced, and you shouldn’t take a phone call on the train. If you are traveling with a group, keep your voices low. The commuter trains are usually quiet. Don’t be the one to change that.
3. Watch Your Backpack
If you have a backpack, take it off before you board a crowded train. You should either hold it down by your legs or toss it up onto the overhead luggage racks. This frees up space and prevents you from accidentally whacking someone when you turn around!
4. No Eating on Local Trains
Eating or drinking on the local commuter trains (like the Yamanote line or the subway) is a big no-no. A quick sip from a water bottle is fine, but save the snacks for later.
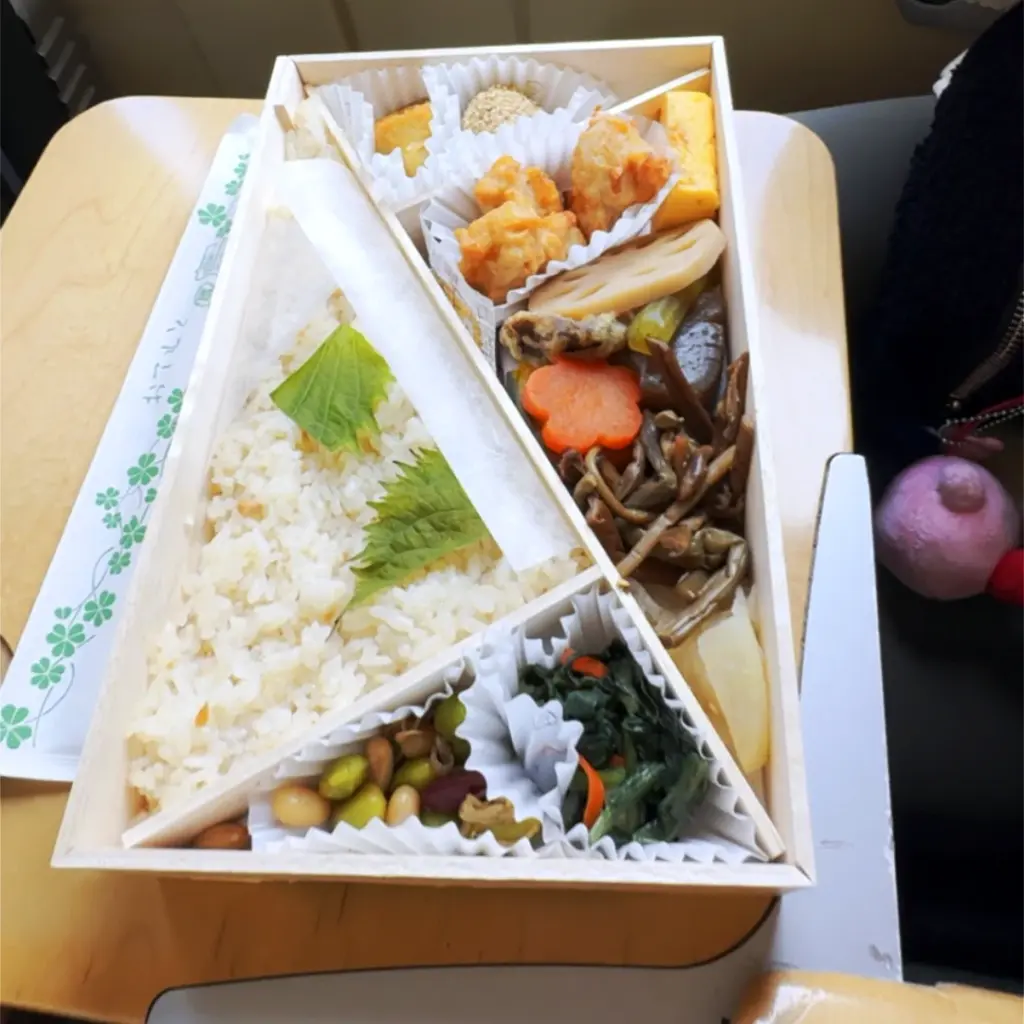
Exception: If you’re taking a long-distance train (like the Shinkansen or the Narita Express), eating is definitely allowed! Grabbing an ekiben (train station bento box) to eat while watching the countryside blur by is a Japanese travel experience we really love.
Conclusion
Navigating a massive, foreign transit system in a different language can be intimidating. But don’t let the fear of getting on the wrong train stop you from exploring!
If you get lost or miss your stop, just take a deep breath. Let it be part of your adventure. It usually just means you’ll stumble upon an amazing neighborhood cafe or a hidden shrine you wouldn’t have seen.
Have the most amazing time in Japan, and happy travels!


Leave a Reply